Okay, this isn't really part two. I've lost all the photos that showed my wings being made. I didn't even go with any of my first deigns. I instead decided I wanted crescent moon wings for my moon faerie. Unfortunatly, I don't even have a photo of them put together. To store them from one faire season to the next I took them back apart and hung them on my wall. Here's a shot of them hanging on my wall.
I'll just have to make a new pair of wings in the future and show my process then.
The outer ring is several strands of the heavier wire wrapped together and then tapped over with a purple electric tape. The inner curve is a bit lighter of a wire and is in a purple color already. Then the spokes of the moons are beads on purple jewelry wire. Each bead is wrapped in the wire to keep it from sliding around. The purples are three different colors, but they all work well together anyway.
Merry met, my name is Kehle and I'm a rennie. I'll keep here a journal of my adventures through garb making and faire going.
Thursday, April 21, 2011
Bag Made From Placemat
My mother bought this place mat for me back when I was still going to the university. At the time my room mate insisted we bunk our beds and I had to have the top so Mom was going to make a bed caddy and use the place mat to make a pocket for me to keep my things in that would otherwise need to go on a nightstand.
I changed room mates shortly after and needed a new purpose, so I thought I might try to make the place mat into a large bag for faire. Everything I used was scraps I had laying around.
I started by making the pocket to go inside the bag. I knew I'd need this either for my wallet or for my phone. I had some scrap velvet from my captain's coat project so I cut a piece to have a decent shape.
The shape changed a bit when I decided I needed to reinforce my pocket seams bias tape before sewing it onto the bag. I used the bias tape to make a little hem around the pocket's edges to help it from unraveling and also because I couldn't do such a small hem in velvet without the aide of bias tape. I sewed my stitch close to each edge of the tape so that nothing in the pocket would get caught on inside seams. This actually gave the pocket a nice little look about it, not that it matters so much as it'll end up on the inside of the bag.
I then sewed the pocket to the side of the bag I decided was the back. Each side is exactly alike so looked over them for any flaws and picked the most flawed side for my back. I then tested the pocket to make sure my phone would fit nicely. It does.
The bag is now mostly done. If you'd wanted to put a handle on it, or a cord for wearing it over your shoulder, you probably would want to do that before you sew the sides of the bag together so you can stitch your cording all the way up the sides, then catch it again when you sew the sides up. That will make sure it'll hold better.
I decided I was making mine to go on a belt, but I'm a little embarrassed to try and show my belt loops because I'm not sure how well they'll hold. And they didn't end up pretty. Belt loops by the way would also have to be sewn on before you sew up the sides of the bag.
With the pocket and belt loops on it was time to sew the seams of my bag. I folded the place mat in half and just sewed straight up each side. My place mat was edged in a black and so I used that black as my guide and sewed up the inside of that line. I stitched each side twice to make sure it'd hold.
Wednesday, April 20, 2011
Captain's Chest
It's been awhile since I've posted anything and that is mostly due to being lazy. I have plenty of pictures of projects I was working on, I just haven't posted them yet. I'll try to remedy that in the near future.
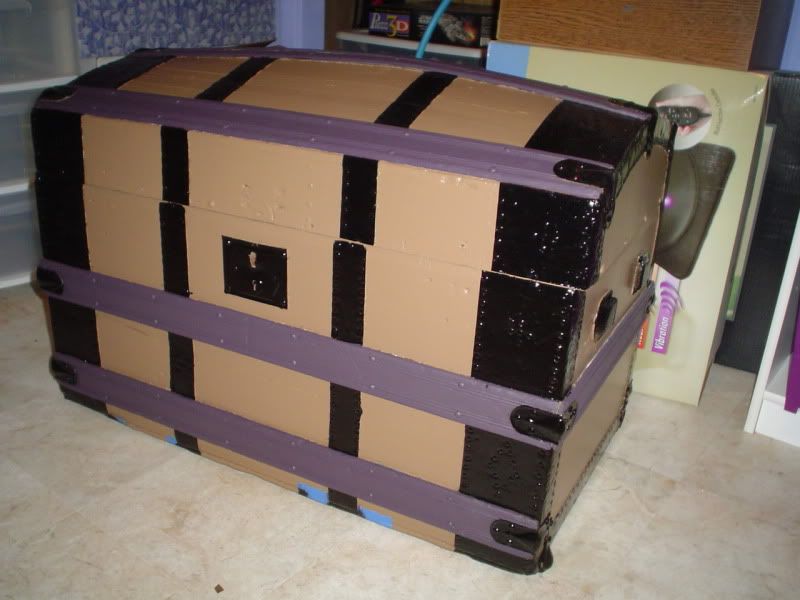
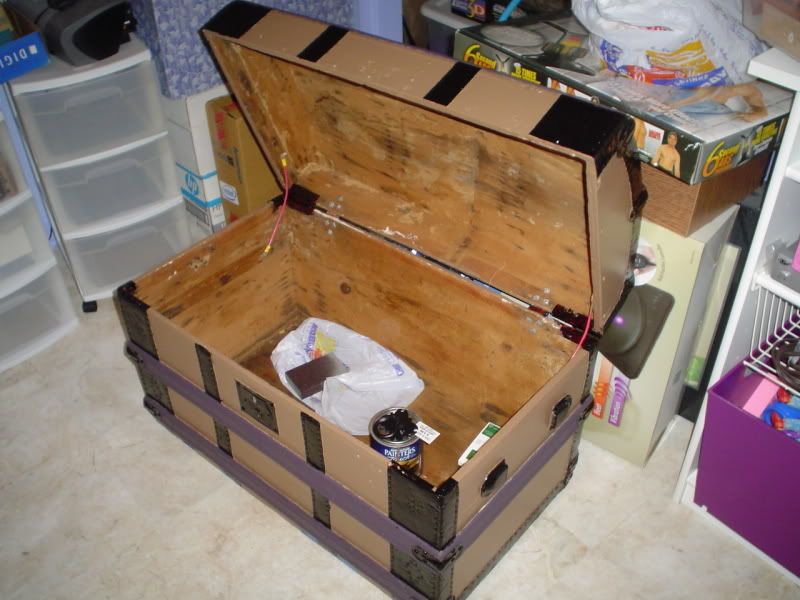
In the meantime here are a couple of shot of an old captain's chest I am repainting to store my renaissance accessories in. The inside is not finished at all. I still have to sand off what is left of the old paper lining and then paint it. Also the tray is missing so I'll be needing to make a new.
The purple on the woods looks a whole lot darker when not in the light of a flash, in fact it's so dark is almost looks black.


Subscribe to:
Comments (Atom)


